

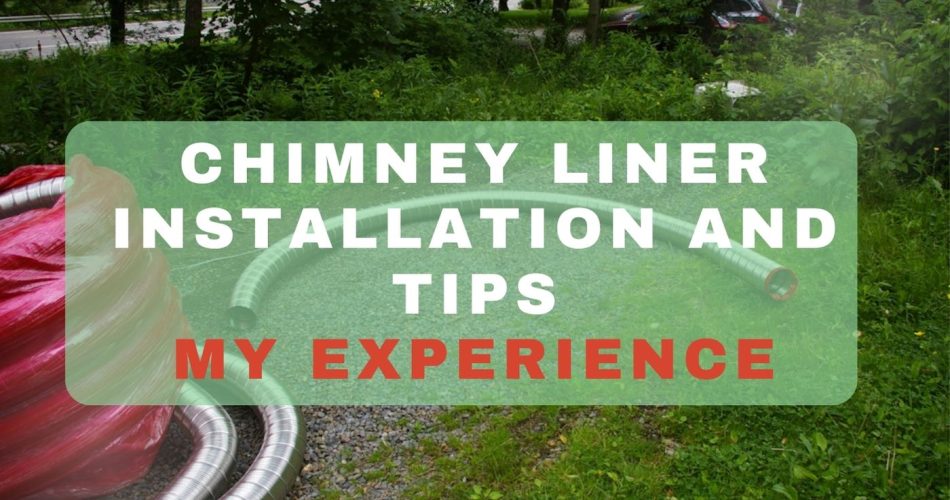

You must install a chimney liner to keep your wood stove safe and efficient. Chimney liners protect the integrity of your chimney’s structure and improve your stove’s performance. Hence, in this guide, I’ll explain why it is better to do chimney liner installation yourself rather than hire experts. Additionally, I will give you a detailed step-by-step guide on installing a chimney liner on your own.
DIY Chimney Liners Installation VS Pro Services

One reason for installing DIY chimney liners is that there are many advantages associated with this. Some of the benefits I enjoyed myself include:
Cost Savings
The first significant benefit I noticed was massive cost savings because professional installation quotations were high in materials procurement and labor costs. By undertaking this project alone, I saved quite an amount, which could be utilized to accomplish other projects around my house. This came as a surprise, but I felt empowered financially.
Satisfaction
I couldn’t describe the feeling of putting wood in the fireplace and lighting it up for the first time after installing the liners myself. I felt an incredible amount of personal satisfaction and accomplishment. It was my own house, and now it was safe. And all that work came from my hands. I was proud of how much better I could be when I put my mind to something.
Choice
Choosing the DIY chimney liner installation route allowed me to use the materials I wanted to use personally. On top of that, every part of this project met my needs because I did so much research on it. This is a level of control that’s hard to let go once you have a taste of it.
Flexibility
Working on my own schedule made this project so much easier. Coordinating with professionals is always a pain in one way or another, especially if they take forever to get back to you or even show up sometimes. Being able to not only plan this project around my own life but also work at my own pace made everything go smoother than expected.
Knowing How Things Work
Doing this chimney liner installation myself gave me an intimate understanding of how everything works between the stove and chimney system. This has been incredibly helpful when troubleshooting issues like these.
Different Chimney Liner Types
All chimney liners come in different materials, each serving its purpose:
Stainless steel liners
These are very versatile and very durable, making them suitable for gas, oil, and solid fuel appliances, including wood stoves, which is what they were used here for. Their ability to withstand tons of heat will keep everyone in your home safe from potential accidents caused by burning wood.
Aluminum liners
Aluminum ones are lighter than most others, which makes them more suitable for gas appliances due to their lower heat tolerance compared to others. But when it comes down to using them with a wood stove, it just wouldn’t be possible because of the extremely high temperatures they can reach and how dangerous that would be.
Clay liners
These are found in older homes more than anything else. They’re old-school traditional masonry chimneys and work with all types of fuels, but they won’t last you as long as others if you don’t take care of them properly. They also aren’t too great at handling quick temperature changes, so they might crack under pressure from intense wood burning.
Ceramic liners
Ceramic ones are like clay ones but with some upgrades. With these, you’ll get better heat resistance and durability so that you don’t have to worry too much about temperature changes because it won’t crack as easily. These are often used when people want to upgrade or repair their existing chimneys. While these work great with wood stoves, installing them is a little pricier, along with being complex to do compared to stainless steel liners, which ultimately put them at a disadvantage for me.
How to Choose a Chimney Liner for Your Installation

One of the most important things I did during my chimney liner installation was choosing a liner. The one I went with is what made my wood-burning safe and efficient. To pick the ideal chimney liner, I considered two main factors: what type of wood stove I had and what condition my current chimney was in.
What Type of Wood Stove Do You Have?
My CB-1008 Cubic Mini Wood Stove needs a chimney liner because it’s small. Without one, it’s unable to:
• Vent combustion gases efficiently
• Prevent creosote buildup
• Keep a consistent draft for optimal burning
Inspecting My Current Chimney Condition
Before installing a new liner, I looked at every inch of my old one by sticking my head in. A few things stuck out that helped me choose:
- Internal Structure: Everything was pretty much intact, but there were signs of wear and minor deterioration that called for refitting.
- Size & Shape: The chimney made some sharp turns and had an odd size that required flexible liners when it came time to install them.
- Previous Usage: A less efficient stove once used this chimney, which caused uneven creosote deposition.
Why Stainless Steel Was the Way to Go
Once faced with these options, I found myself stuck between stainless steel and clay tile. But after comparing them side by side, stainless steel won for several reasons:
- Durability: It’s resistant to corrosive effects from combusting wood, so I knew longevity wasn’t an issue.
- Flexibility: You can shape it around corners and whatnot without breaking it. Doing so can guarantee a proper fit for my weird-sized chimney.
- Maintenance: Cleaning is easier since the liner has a smooth surface. It can prevent creosote build-up more efficiently. It’s also easier to inspect, which is crucial to keeping your chimney safe and avoiding problems with its operation.
- Efficiency: It gives better draft because of the liner’s smooth interior. A draft is absolutely necessary for proper stove ventilation.
Preparations for Chimney Liners Installation
If you want to make sure everything goes smoothly during installation, follow these simple steps:
1. Prepare your tools and materials for chimney liner installation.
Here are some things you’ll need:
- The liner itself
- A cleaning brush
- Measuring tape
- Essential safety gear (goggles, gloves)
2. Assess the condition of your chimney.
Take a good look at your chimney and see how it’s doing. I learned this the hard way when a damaged section caught my eye before I could install anything there. Here’s how you can do it too:
- Visual inspection: Start by checking for any cracks, loose bricks, or missing mortar on the exterior of your chimney.
- Chimney cap: Make sure you have one that isn’t damaged or clogged with debris — not having one makes it easy for water or animals to get inside.
- Chimney crown: Look for signs of wear, such as cracks and chips, and any other damage that could lead to water intrusion.
- Flue: This is usually found near the opening of a fireplace or stove — check here for blockages, soot build-up, or flue liner damage
- Flue liner condition: Finally, check the condition of the existing flue liner for cracks, gaps, or deterioration. A damaged liner can be a serious safety hazard.
3. Measure your chimney.
Measuring your chimney is equally important to ensure the liner fits perfectly. I measured my chimney using a tape measure, mirror, and flashlight. Here are the steps I took:
- I measured the inner diameter of the chimney opening from the top or bottom.
- Then, I measured the chimney’s height from the base to the top or crown.
- I used a flashlight and mirror to inspect for any bends, offsets, or obstructions that might affect the liner installation.
- I wrote down the measurements, noting any specific features or obstructions to consider when selecting my chimney liner.
Chimney Liners Installation Step-by-Step
Below are the steps for a DIY chimney liner installation. Make sure to adjust according to your chimney’s dimensions and specifications.
1. Inspect and clean.
A thorough checkup of the chimney is necessary before installing a new liner. Look out for any signs of damage or obstruction, then clean out soot and debris.
I found using a good-quality chimney brush much easier. That’s because it made the cleaning process more efficient and less labor-intensive.
2. Prepare the liner.
Cutting the liner and attaching the connector/adaptor simultaneously require precision. During my first DIY chimney liner installation, I learned that it is crucial to check measurements twice before making any cuts.
3. Insert liner.
The task of lowering it down your chimney while securing both ends can be daunting but rewarding in the end. Here are other techniques you could resort to simplify this step:
Use a weight.
Attach one at your liner’s bottom to straighten it and provide momentum when going through bends or narrow sections in your chimney. Personally speaking, I used sandbags that were small but heavy enough to sustain their shape while helping with descent.
Use a pulling method.
To do this, you’ll need either a rope or cable attached at one end on your liner’s bottom through from top to bottom of your chimney in a threading manner. As one person feeds in your liner from top to bottom, another person should lightly pull on either material (rope/cable) from bottom to top.
Keep communication strong since if someone pulls too hard, they might jerk, which causes damage to your liner.
Use flexibility to your advantage.
When dealing with flexible liners, take advantage of their pliability before beginning to ensure no kinks or bends are present at all costs. Remove them by gentle hand flexing/bending as needed. This way, you’d make it easier for it to navigate through your chimney without getting stuck.
Apply lubrication.
Lubricating the exterior of your liner allows for an even smoother installation. This will reduce friction between the liner and the interior walls of your chimney, making it much easier to feed your liner down the chimney.
Just be sure to use safe and high-temperature environment lubricants that cause no damage to either linen or chimney walls.
4. Securing the liner
This is how you secure a chimney liner, based on my experience and what I think are best practices:
a. Prepare the chimney crown.
Ensure the top of your chimney is clean and free of debris, moss, or loose material before installing your new chimney liners. I used a stiff brush to clean mine so the adhesive or sealant would form an excellent bond.
b. Measure and cut the liner.
Each section of the liner should extend above the crown by at least 4 inches (6 in. is better for attaching a rain cap and meeting building codes in most jurisdictions). Before cutting anything, measure twice to avoid errors, then use metal snips to trim each section to length carefully.
c. Install storm collar and rain cap.
A storm collar is a metal ring that fits tightly around the liner just above where it exits the crown; slide it down over the top end of the liner before fitting on a rain cap. The storm collar keeps water from running down between the outside of the liner and the inside wall of masonry. Its position is important because you don’t want water getting into that space either.
Attach a rain cap once both parts are positioned properly. It’ll block rain, debris, and critters while allowing smoke and gases to escape through its wire mesh screen. Ensure that screws or clamps provided by its manufacturer should hold it snugly in place.
d. Apply sealant.
After sliding both parts toward their required positions, I applied high-temperature waterproof sealant around their bases. This will keep water from entering through cracks between parts. After first sealing any gaps along joints, I smeared this black gunk all around each base.
e. Secure the liner to the crown (if required).
Depending on installation specifics or local building codes, you may need to fasten the bottom of each section of liner directly to the crown. Options include a top plate or a custom-made bracket that fits around the liner and lies flat atop the crown. I used a top plate for this step, which I centered around each section and then either screwed or glued to its surface.
5. Insulating (Optional but recommended)
While not required, we highly recommend insulating your chimney liner to improve safety and efficiency. Insulation can help:
- Keep the flue gases warm as they travel up the chimney
- Maintain the temperature of flue gases, reducing condensation and risks associated with it
- Reduce the risk of creosote buildup, which is often the culprit for chimney fires
- Ensure you comply with local building codes and standards.
Chimney liner insulation can be done in two ways: blanket (wrap) insulation or a mix-it-yourself vermiculite-based insulation. I went with blanket insulation because of its simplicity and effectiveness. It usually comes as a kit with insulation material and a protective wrap.
Here are some steps to guide you when wrapping insulation:
a. Measure and cut the insulation.
Measure your chimney liner length and cut the insulation blanket to equal this length. To ensure maximum efficiency, press tight against the liner when installing it. I left a little extra length if I had to adjust it while fitting.
b. Wrap the liner.
Open your kit’s insulation blanket and wrap it evenly around your chimney liner—there is no need to go too tight here. Most kits will have foil tape included. I used this tape to secure everything along the seam, ensuring no loose areas or gaps were present.
c. Apply protective wrap.
After getting your insulation blanket down pat, go ahead and wrap an aluminum foil or mesh protective layer around it. This part serves two purposes:
- To keep your newly installed stuff safe from damage during the installation process
- To give it more strength overall—use foil tape again here for good measure, sealing along all lengths of this wrap, too
d. Secure with wire mesh (if required).
Some kits might ask—or even include another wire mesh—to put on top of protective wrap for extra security/durability. For my project, I wrapped around the insulated liner and then secured it at intervals with wire ties. Doing this ensured my insulation went nowhere while I continued the chimney liners installation process.
e. Final inspection.
To make absolutely sure your insulation is evenly distributed and securely fastened before moving on, give it a quick final inspection. If everything looks good, you should have no loose sections or exposed areas on your properly insulated chimney liner.
6. Finalizing the chimney liner installation
The last steps in the chimney liner installation involve putting a cap/top plate on and sealing the crown with silicone or mortar to protect it from external elements and debris.
The main thing I learned here was not to rush these final steps. They will ultimately provide long-term protection and efficiency for your chimney system.
Tips for Smooth DIY Chimney Liner Installation
Creativity and innovation are the secret weapons that let you overcome challenges during chimney liner installation. Try these tips on your next project:
- Use a long, flexible rod to guide the liner down the chimney. This technique is very effective when navigating tight bends or obstructions. Another method is a pulley system to lower the liner down. The advantage here is even weight distribution, which reduces the risk of damage.
- Modify tools you already have or craft new ones. A small camera or mirror attached to a flexible rod will help inspect the chimney’s interior without professional equipment.
- Use homemade weights like sandbags. Attach them to the bottom of the liner so it slides straight down.
Safety First Before Doing Chimney Liners Installation
When I installed a chimney liner for my wood stove, safety was my top priority. Below are two things critical in ensuring safety:
Carbon Monoxide Detectors and Regular Maintenance
Installing carbon monoxide detectors was at the forefront of every decision and action I made during installation—even before I started putting in chimney liners. Knowing that incomplete combustion could cause carbon monoxide leakage made this an essential step—no bargaining involved. It gives me peace of mind that my family is safe from this invisible, odorless threat.
The second one is regular maintenance—it’s just as important as installing detectors. After my chimney liners were installed, I made it a point to check and clean my chimney and liner once a year. I often do this before the heating months begin.
Doing this often ensures no creosote buildup or obstructions, thus significantly lowering the risks of fires and carbon monoxide issues. By doing this regularly, I became more acquainted with my chimney’s condition. This was a humbling experience that showed me what I did and didn’t know.
When to Call in a Professional for Chimney Liner Installation
I’m all about getting things done myself. However, even I know when a project is out of my league and professional intervention is necessary. Here are some scenarios based on my past experiences:
Complex Installations
Though my chimney liner installation was relatively easy, there were parts that made me unsure about proceeding with safety in mind. Two examples are ensuring proper fit around bends and securing the liner at both ends. In cases like these, it’s better to call an expert who has likely faced situations similar to yours.
Inspections
A certified chimney sweeper was called to inspect my work after I finished the installation. Their assessment confirmed that what I did was safe and up to code. It also gave me a chance to learn as they pointed out areas for improvement while reassuring me about the overall quality of my work.
Repairs
During my latest maintenance sweep, I found a couple of innocuous issues, but they were outside of my skill level to handle safely. Additionally, I noticed that a section of the old lining had decayed away. Since I knew where to draw the line with DIY stuff, I called a professional to take care of this before it worsened. At least, now I can sleep well knowing that my chimney system is as safe and efficient as ever.
Chimney Liners Installation Checklist
A checklist became a crucial part of my routine after successfully installing the chimney liner for my wood stove. I wanted to ensure everything was in perfect working order. This way, I could get some peace of mind knowing that it was complete, safe, and efficient.
First Things First
One of the first things I did after the chimney liner installation was to check for leaks and make sure there was a proper draft. Any leaks in the chimney liner could lead to dangerous fumes entering my home. Also, a poor draft could significantly affect how well my wood stove performs.
I visually inspected the connections at the stove and the chimney crown to do this. Then, I felt around these areas with my hands for any signs of air escaping while the stove was in use because if I noticed any draft around connection points, it would indicate a leak.
To check for a draft, I used a simple method that involved lighting a small piece of incense and holding it near the stove’s opening when it was cold outside. I watched how the smoke behaved to see if it was getting pulled into your chimney or not. I knew that if smoke gets tested like this, it must efficiently draw air out through my newly installed chimney liner.
Smoke Test
This was one of the most important steps in my post-installation checklist, as it confirms that your new chimney liner has been installed correctly and is functioning properly. Here’s how I did mine:
- Preparation: Make sure your wood stove and chimney are both cold, as warm chimneys might not give you accurate results. Open the damper fully so airflow isn’t restricted at all.
- Create smoke: Get yourself some home improvement store smoke pellets. These generate plenty of smoke without large flames, which is what we want here. Place them on a fireproof base inside your woodstove and light them according to the instructions provided by the manufacturer.
- Observation: Smoke travels up through the chimney liner if it has been properly secured. Go outside to see if you notice any smoke exiting your chimney. This is a clear sign that the liner is doing its job by channeling smoke and gases out of your home.
- Safety measures: Get carbon monoxide detectors, then test and make sure they’re working correctly because safety always comes first. Ventilate properly while performing a smoke test to avoid the risk of carbon monoxide building up in your home.
If you’ve followed these steps correctly, then your DIY chimney liner installation should have succeeded! Not only does it show that the liner was installed and sealed correctly, but it also shows that the chimney drafts properly. This is important for the safe operation of the wood stove.
Maintenance and Care After Chimney Liners Installation
Always remember to take care of your maintenance. It’s essential in maximizing the lifespan of efficiency of your chimney liner. Checking for damage, wear, or corrosion can help prevent minor issues from becoming bigger problems. Another thing you want to do is clean the liner regularly to remove soot and creosote that may have built up over time. Doing these two things year after year will keep your system running safely and efficiently.
You also don’t want to ignore any signs that your chimney liner may need repairing or replacing. Some signs include:
- Visible deterioration
- Reduced heating efficiency
- Unusual odors or noises
If you detect this early enough, it’ll save you from spending unnecessary amounts of money on repairs.
Also, if you use a wood stove fan, don’t forget about those, too, when checking everything over. Keeping them well-maintained will help protect the stove and surrounding area from overheating. The fans circulate air, which helps reduce hot spots.
Conclusion
My journey with DIY chimney liner installation was fun! I learned so much while keeping everyone safe, but I still ran into some obstacles requiring me to call professionals in.
For those who also did this project on their own, be sure to install a carbon monoxide detector, follow a strict maintenance schedule, and, if possible, get a professional inspection every few years just for peace of mind.
But overall, remember safety is always number one, especially if there are others living with you in the house who aren’t as experienced with this sort of stuff!
Additional Resources
For further guidance, you can check out the video below for a quick guide on how to install a stainless steel chimney liner:
You can also learn more about installing chimney liners safely through these readings:
These resources can be invaluable as you plan and execute your chimney liner installation project.
[…] Aside from chimney caps and chimney chase covers, another important part of your chimney system is chimney liners. I shared my experience with installing one here. […]
[…] Chimney Liner Installation and Tips – My Experience […]